 |
|||||||||||||||||||
|
|
|
|
||||||||||||||||
|
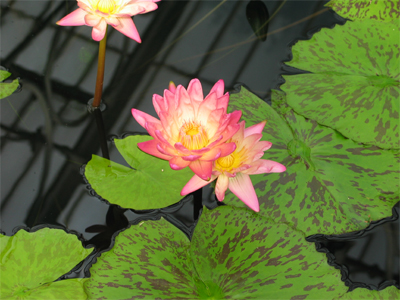
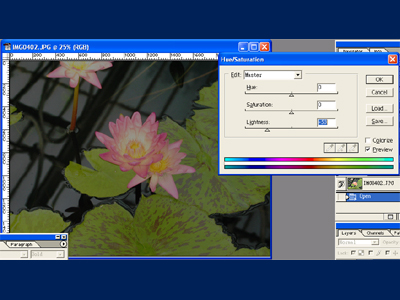
Basic - Hue/SaturationSample ImageSample image for the demonstration of Hue/Saturation. |
||||||||||||||||||
|
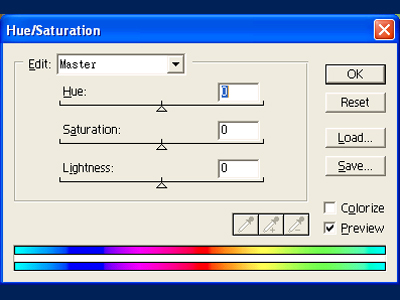
Hue/Saturation windowSelect "Image->Adjust->Hue/Saturation" to open this window. You will see a drop-down list for color channels(RGBCMY) at the top, three slide bars in the centre for Hue, Saturation and Lightness respectively, two color stripes at the bottom and 2 checkboxes at the bottom right corner. Let's take a look at each control. |
||||||||||||||||||
|
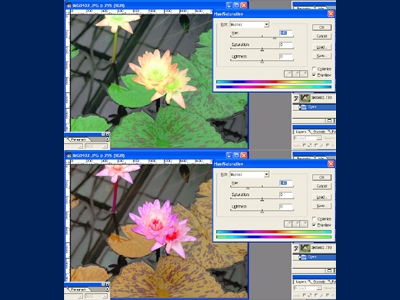
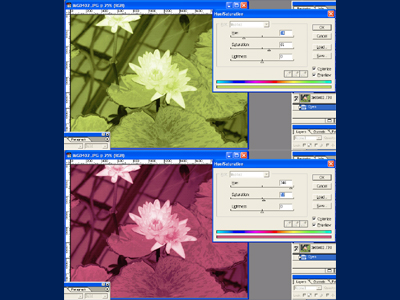
Slide bar for HueThe first slide bar controls the hue of the color of the image. You will need to watch the bottom two color stripes when adjusting it. The top stripe is the reference color and the bottom one reflects the change. When the slide is moved, the color in the bottom stripe will start to shift in the same direction as the slide. The result is that the original color of the image will be shifted in the colorspace and replaced by a different color. For example if the red section in the bottom stripe is below the green section in the reference stripe when the slide is stopped, then all the green in the image will now become red with the same intensity. |
||||||||||||||||||
|
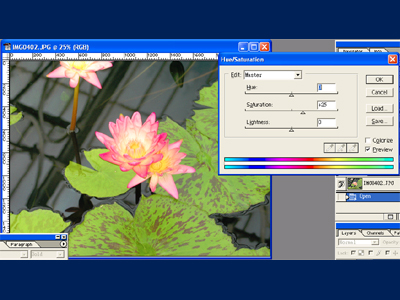
Slide bar for SaturationThe name implies what this slide bar is for. It simply changes the intensity of all the colors. When taking pictures in a cloudy day, the colors might look a bit dull. By boosting the saturation slightly could give a more lively and vivid look to the photos especially for trees and flowers. |
||||||||||||||||||
|
Slide bar for LigntnessThe third slide bar controls the brightness of the image. All of the three controls can be used on a single color channel selected from the top drop-down list. |
||||||||||||||||||
|
ColorizeWhen the "colorize" checkbox is ticked, the image will be converted into a single colored picture(like a grayscale image with a color overlay). The Hue slide bar now controls which color you would like for the result image and the saturation slide bar controls the intensity. This combination acts as a color filter for B & W photography. |
||||||||||||||||||
|
Try not to add too much saturation as extremely intensive colors could render the picture into a fake image. Tips: Hue can be carefully used to correct minor WB(White Balance) error in a photo. However if the original photo is saved in RAW format, then try to stick with the RAW converter WB correction. |
|||||||||||||||||||