 |
|||||||||||||||||||
|
|
|
|
||||||||||||||||
|
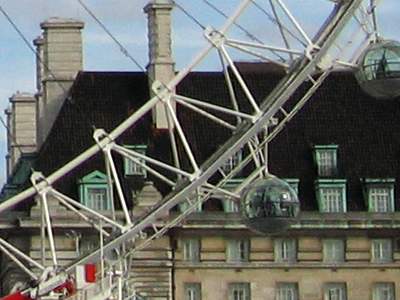
Unsharp Mask(USM)Sample ImageThe sample image is a 100% crop of the original image. This helps illustrating the effect of sharpening more clearly. |
||||||||||||||||||

|
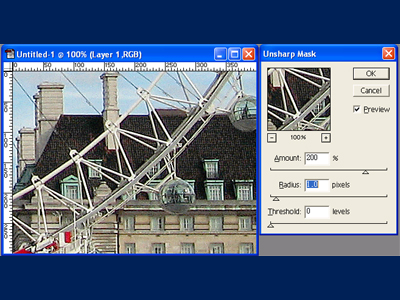
Unsharp Mask windowSelect "Filter->Sharpen->Unsharp Mask" to open the USM window. On the top left corner there is the preview window, below are three slide bars for Amount, Radius and Threshold respectively. There is also a "Preview" checkbox on the right. Make sure you tick this box in order to make testing easier and faster. |
||||||||||||||||||
|
AmountSharpening is about restoring acutance which has been lost during the image capturing process. Acutance is a measure of how precisely an edge is defined. The way USM works is by increasing the contrast between pixels near the edge resulting in reduced fuzziness and more clearly defined edges. The "Amount" parameter tells USM how much it needs to darken or lighter the pixel around an edge(USM has its own edge detection algorithm). |
||||||||||||||||||
|
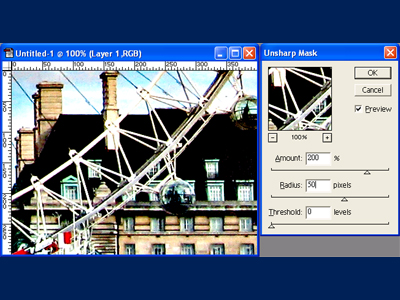
RadiusWhen USM finds an edge in the image, the "Radius" parameter specifies the size of region around the edge which needs corrections. |
||||||||||||||||||
|
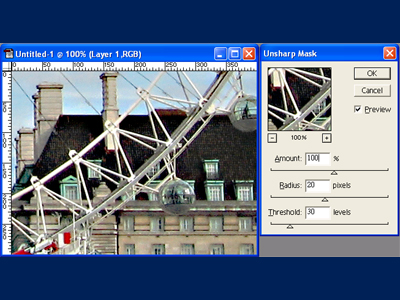
ThresholdThe "Threshold" parameter tells USM how big the difference between the blurred pixel and the original pixel is needed before applying corrections. Higher threshold value decreases the number of edges being corrected. |
||||||||||||||||||
|
Every image requires different amount of USM. You should experiment with different combinations of Amount, Radius and Threshold when trying to sharpen your own images. Please avoid over-sharpening an image as it will create halo around bright regions, cause shadow areas to lose details and amplify noise artifacts. Tips: When using USM, a general method is to use a medium Radius with low Amount and small Threshold to bring out thick edges first and then use very small Radius(less than 1) with large Amount and 0 Threshold to bring out the fine details. |
|||||||||||||||||||